GOT A UKULELE - Ukulele reviews and beginners tips
Showing posts with label beginner tips. Show all posts

28 Sept 2020

Got A Ukulele Beginners Tips - Oiling a Fretboard

Following a ukulele review I recently wrote about a uke with a horribly dry fretboard, I was asked in a comment for advice on oiling a fretboard. I realised I didn't have that guide in my beginners page, so figured it was time to set that right 

And it's about time because this is a subject I see talked about an awful lot, and I'm afraid to say that a lot of the advice is questionable and, if followed literally, capable of damaging your instrument! Here's an example of a bad one...

ukulele fretboard without oil

Read More »

21 Jan 2020

Online Ukulele Shopping, Quality Control and Avoiding Problems

Just a little interlude for you between ukulele reviews. Shopping for ukuleles, online shops, quality control and avoidng problems. Enjoy! (video below!)

Online ukulele shopping


Read More »

9 Dec 2019

How The Got A Ukulele Reviews Are Recorded..

This is an article I have long been thinking of writing if I had the time, because it's a question that often comes up. How do I record these videos exactly?

Read More »

9 Mar 2017

Swapping Ukulele Tuning Pegs

Just a short advice note on swapping ukulele tuning pegs for others and some of the work you may need to do to achieve it

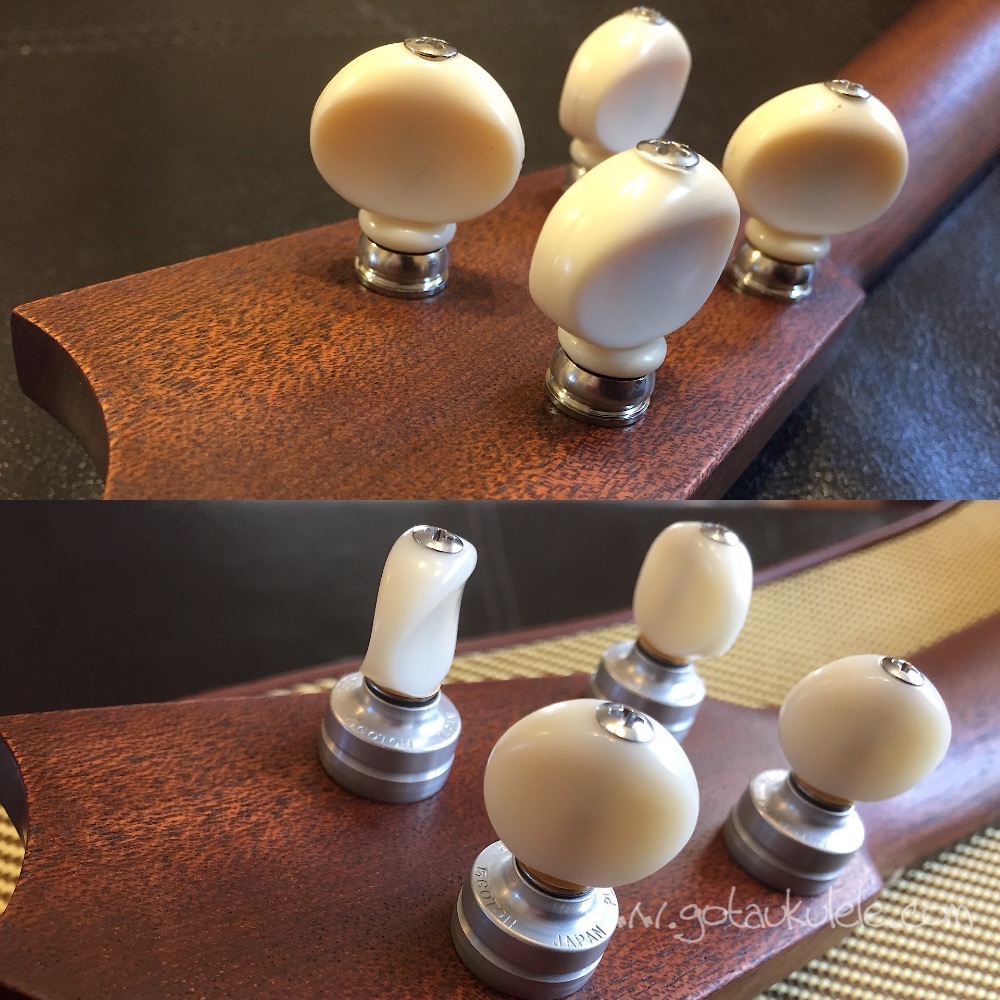
In this first picture you will see a 'before and after' on a Martin Soprano ukulele - previously Grover friction pegs, latterly Gotoh UPT's. A change I wanted to make just for the fun of it.. And really easy to do..

ukulele tuning peg swap
Read More »

23 Feb 2017

Playing a Ukulele In Tune With Itself

If there are common worries I see from beginners of the ukulele, it's a fear of playing in different keys or of transposing chords and melodies on the fly. It usually shows up in a downright fear of playing baritone ukulele in G tuning and wanting to tune it in C, but it equally applies to all sorts of tunings and transpositions.

relative ukulele tunings


Read More »

22 Feb 2017

Does The Finish On A Ukulele Affect The Tone?

A question you may have asked yourself.  Does the finish on a ukulele affect the tone? And I thought long and hard whether to dip my toe into this pool..

ukulele gloss finish


Read More »

10 Feb 2017

The Essential Ukulele Accessories

Just a short Ukulele Beginners Tips video I was compelled to make following a discussion I saw online recently.

ukulele accesories


In that discussion, somebody (a new ukulele player) was asking what accessories they should buy to go with it. I was staggered by the rather unhelpful responses, including odd ideas and several items that really just are not needed when starting out. I was also staggered at the lack of mention of the basics.

So, here you go... enjoy


Now - please bear in mind that these are the ABSOLUTE BASICS I recommend. If you like buying gear, you will find my fuller list of ukulele accessories here - some of your suggestions may be on the longer list - but this video was about BASICS.

Read More »

5 Jan 2017

My Ukulele Doesn't Hold Its Tuning - What Can I Do?

Probably one of the most common ukulele beginner gripes this one, and a subject I continue to see so much terrible advice about online. A Ukulele that doesn't hold tuning.

Actually, I am going to start this ukulele beginners post from another angle as this was the one that prompted me to go over this subject again.. An that is the completely unhelpful advice I regularly see given out to people who are asking for ukulele recommendations. That advice goes along the lines of...

"I recommend [Brand X] ukulele because this one holds tuning really well..." 

ukulele strings

Read More »

17 Nov 2016

Choose Your Ukulele Dealer Carefully!

In a conversation this morning helping out a new ukulele buyer, I once again came across the issue of choosing your ukulele shop with care. It was being answered by the usual suggestion of buying from Amazon...

Amazon ukulele
This Stagg ukulele was rated one of the best ranked ukuleles on Amazon - it was more fit for firewood...

Now this is a subject I have touched on in various other blog posts, but realised that I hadn't written a more consolidated advice guide on where I think you should consider buying your instrument, particularly your first one. Well, that and why I don't recommend the 'Mighty Zon'..

I regularly see comments made online on this subject that say, 'That chap at Got A Ukulele doesn't recommend buying from Amazon'. And it is almost always followed with someone saying 'Well, I bought from Amazon and it was absolutely fine, so he doesn't know what he is talking about'..

Let's be clear - NO, I don't recommend buying from Amazon except in certain cases. Same goes for eBay if you are a beginner, and in fact also goes for a worrying number of big brand music stores too. I will deal with the exceptions further on in this piece, as like anything there is no one size fits all here, but lets first look at where and why I make the general warning against the big A.

The likes of Amazon, big selling channels on eBay and the large brand music stores come with a couple of issues for me. First of all, those sellers tend to concentrate (in the main) on the cheaper end of the ukulele market. We are talking the sub £200 price point with a particular focus on the sub £100 (or even sub £50) price. And the second point is that direct purchases from Amazon (and sadly, many big brand music stores) mean that for online shopping the ukulele will come to you unopened. In other words what the factory sends to Amazon is exactly what you will get. And here lies my problem.

It is a simple fact that the cheaper you go with a ukulele, the greater the chance you will find that the instrument needs (at the least) some setup work (adjustment of the saddle or nut to ensure accurate intonation), or something more serious like a warped neck or misplaced bridge that means that it should have been weeded out from sale altogether. Not every cheap ukulele needs that, and of course such issues can occur even with higher end instruments, but it's about percentage chances. Trust me - the cheaper you go, the more the chance a ukulele will need checking over before being shipped. Enough instruments have come through my hands over the years to see the pattern.

And Amazon just don't do that checking over. Big channels on eBay just don't do that and even big brand music stores who have jumped on the uke bandwagon just don't do that. So why is that such a problem?

Well put simply, the majority of buyers of instruments at this price may well be beginners. It may be their first instrument in fact. Do they really know how to adjust setup on a ukulele, or how to reject an instrument that has a fatal build flaw. In fact will they even know that there is an issue? I see lots of beginners talking about cheap ukuleles saying things like 'this one is good because it holds tuning, the other one I bought sounded out of tune'. I've seen beginners suggesting that wonky tuning is actually a 'feature' of the humble ukulele and is to be expected. Holding tuning is not something that is good or bad and specific to certain brands - it's something that can be fixed on ANY ukulele. That is part of setup! But I think more often than not, if they hear an instrument playing out of tune, they tend to blame the strings and not the setup. And no, wonky tuning is NOT a feature of the ukulele.

And for those people who DO recognise there is an issue with the ukulele, what do they then do to resolve it? Return it? Have a go themselves and get frustrated? Take it to a shop and pay them to fix it? All of a sudden that cheap ukulele isn't so cheap any longer. If you spend £30 on a ukulele, then another £10 on strings because it sounds out of tune because somebody on the internet told you its a string issue, but then that doesn't fix it... You then pay another £20 to get a shop to set it up and all of a sudden your £30 ukulele becomes a £60 ukulele complete with a load of extra hassle and wasted time.

And that price issue is really the reason why people choose Amazon. They are highly competitive, and also offer excellent and cheap delivery options. Similar ukuleles, when you consider shipping, from independent specialists may cost you more money and people vote with their wallets. What I am saying is it's completely false economy if you are going to have to spend more money down the line. And it's for that simple reason that I recommend specialists who will look the instrument over and adjust the setup if needed. It's called peace of mind.

Now, back to that comment of 'I bought one from Amazon, and it's fine' that I always get in defence. I never said that it's impossible to get a good one. In fact you could buy ten ukuleles from Amazon and find that they are all setup just fine. Great. I'm really glad for you! But I'm afraid there are many examples that are not fine and just because you did well doesn't make it a hard and fast rule for all. Case in point is the Kaka ukulele I recently had from Amazon for review. The saddle needs adjustment and so does the nut. Those are fixable if you know how, but the bridge that is in the wrong place is more fatal and a massive job to fix  (if it's even worth it). I see a LOT of instruments from Amazon, and trust me - these things happen more than I would like. And it's a fact that a good ukulele specialist would have weeded this one out from sale. I've seen many like that from Amazon. Oh, and bear in mind that ukulele specialists that do setups do so for a REASON.

One other worrying trait I have seen with Amazon ukuleles in the last couple of years are the huge numbers of new brands that hit the Amazon sales pages (usually from China) that look utterly generic and in a short space of time start to amass huge numbers of 5 star votes. How can that be? Well, it's well documented in the press that with many product lines the Amazon review system is, frankly, broken. That's because a lot of these reviews are faked one way or another. In fact I have evidence of several brands who are effectively 'paying' people to write good reviews in return for free instruments. I even saw one who was paying hard cash for people to write pre-prepared product questions and answers on their items. And why? Because lots of activity and lots of 5 star reviews makes the product appear higher on searches when you tap in the word 'ukulele'. So what that means for the seaching consumer is they are faced with at least three full pages of brands that never appear in music shops, with impossibly low prices and massive 5 star vote counts. Totally unethical.

So what are those exceptions I talked about? Well there are a couple of situations in which I wouldn't hesitate buying from Amazon.

1. When you already know how to undertake a full ukulele setup. I do, so I know that if a uke arrives with a high saddle, high nut or dodgy tuners, that I can easily put it right. I wouldn't want to tackle a warped neck however, but I can sort the majority of issues that instruments face. If you are not comfortable with this though, I'd recommend using a dealer who will do that for you and remove the worry.

2. That you are dealing with a real specialist who is using Amazon or eBay as a marketplace storefront. When you look at your product listing - have a look whether it says who is fulfilling the order. If it is coming from Amazon it is coming direct - from a shelf in a warehouse and will NOT be set up by anyone. It may however be coming from a marketplace seller who is a reputable ukulele specialist. I know a few great stores who use Amazon this way - those sort of sales are fine because you KNOW that you are getting one from a dealer who has opened the box before shipping it to check it over.

But sadly that's it.

People often ask why my list of ukulele dealers isn't longer. It's short for the simple reason that I only list stores that I know will check instruments over before despatch and may offer a full setup a part of the price. And the sad thing is - there are not all that many of them, even globally. Just because a big brand music store is on every high street and happens to sell ukuleles - doesn't mean they are ukulele specialists. In fact for online sales, most of the big brand stores are despatching, unopened, from warehouses themselves. So I'd still really urge sticking to the stores who know and understand the instrument. Trust me, it will be less of a headache in the long run.

And yes, I know that some of you can only rely on online shopping, but most if not all the specialists I list offer that. And yes, even the specialists can get things wrong too - but again, it's all about the chances. Think of it like Russian Roulette. Mistakes do happen with any store, but at least the specialists are opening the boxes which is more than can be said for the big box shippers..

Go carefully!


WHY NOT DONATE TO HELP KEEP GOT A UKULELE GOING?


THANKS!
Read More »

8 Oct 2016

Ukulele Capos Roundup - REVIEW

An accessory that I haven't really talked much about on Got A Ukulele is the Ukulele Capo.

It's something I am seeing more and more of, so thought it would be good to do a roundup review of the main styles available.
ukulele capos
Clockwise from top left - Shubb, D'Addario, Chord Trigger


So what is a capo? Well it's short for 'Capo d'astro / Capotastro' and is a device used on stringed instruments to deliberately shorten the scale length of the instrument. In essence it's a clamp that can be applied to one of the fret spaces to raise the key of the instrument when played open by effectively moving the nut down a selected number of spaces. It's used to transpose a sequence of music up in key whilst allowing the player to use the same chord shapes.

Now, I personally haven't really seen the need for ukulele capos. They are popular on guitar, but then the guitar has a much wider fretboard, is harder to engage the strings and has six of the blighters. On the ukulele however, I've never found it all that complex to use natures own capo - the first finger - to barre the neck and do the same job. But the spirit of Got A Ukulele has never been to tell people that 'you can't do that', and as I say, I am seeing an increasing number of people use capos, and not just beginners either. At the end of the day, they are convenient!

For me, there are various elements to a ukulele capo that are important to take into account.

First thing is the size of the capo. I shudder when I see people saying they use a guitar capo - that would be an incredibly bulky thing to clip on the neck of such a diminutive instrument. In short, you want a capo that doesn't intrude on your left hand technique.

Coupled with that point is weight. I have an intent dislike for ukuleles that are unbalanced and heavy in the neck. If you are playing without a strap, they always feel like the neck is trying to drop to the floor and it's an uncomfortable experience. Adding weight to the neck of an instrument can only cause problems in that regard.

And finally we have to think about ease of use and price...  So I've gathered together a few types here that I think represent the most common capos you will find on the market.  There are others, but they are all just variations on a theme.

First up is a generic trigger style capo, often referred to as a Kyser (although, in actual fact, a Kyser capo is quite different, but it's the same general principle). This model is made by Chord but these sort of capos really are ten a penny in all sorts of brands, and all do the same thing. It's basically a clip that acts like a clothes peg, with a spring to keep it in the closed position. There are a number of positives with the trigger style capo. They are cheap (this one retails at about £5), they are light (this one is 17 grams) and they are super easy to attach and move up and down the neck. You can even clip them to the headstock when not using them and they naturally fit all depths and profiles of neck without adjustment. I like all of those features, but this sort of style is just not something I can get on with to be honest. You see, when in place and fretting in the low positions with your hand right next to it, I find it gets in the way. Those sharp edges and sticking out bits catch my hand when in use. It's damn annoying. Your mileage may vary as your hand size and technique may have something to do with it of course, but these are not for me.

trigger ukulele capo
Trigger style ukulele capo

Next up is an old favourite in the guitar world with a ukulele capo made by Shubb. These clip capos have been around on guitars for years, and they are incredibly popular. The simple reason is that they are tough as old boots, simple to use and unobtrusive when in use.  So I was delighted to see a ukulele version, which is similarly made. The Shubb uses a clever hinge to lock it in place, but it does take some adjustment of the screw to set it for your particular depth of neck. It's clever though and very well made. That solid construction though comes at a price as they are HEAVY. In fact, this Shubb weighs a whopping 51 grams, which for me is a heck of a lot of weight to be hanging on the neck of your instrument. (EDIT - I have been informed that Shubb make a 'Lite' version of this, but it is still the heaviest of these three at about 28 grams).  On the plus side though it's easy to use (though not quite as easy as the trigger style), and when in place is folded down into a small area so it really doesn't interfere with the fretting hand. You may however wince when you realise that the price of around £17... For me though it's all about that weight. A nice idea that is perfect for the guitar, but totally over-engineered for the ukulele I think.

Shubb ukulele capo
Shubb ukulele capo

Finally is the kind of halfway house that is more of your manual style capo. This one is from D'Addario / Planet Waves. At about £17 this is also not cheap, but it's very well made from lightweight aluminium. In fact it's the lightest of the three looked at here, weighing a meagre 14 grams. And in addition to not noticing the weight, when it is in place it takes up so little space that you don't notice it when playing either. In fact it is far smaller than the Shubb. There is a downside though. The D'Addario is attached by adjusting the rear screw to open the capo like a vice, and then tightening it when in place. It means that swift changes of position can be fiddly, and if ever there was a capo that was going to get lost on stage - this is it! It's just not as straightforward to adjust as the other two.

D'Addario ukulele capo

So as you can see, there are compromises with all three. Personally I can live with some of those downsides, but weight and the capo interfering with my playing are two that I would want to rule out absolutely. For me then, the D'Addario is the only one I would live with. Sure, it is less user friendly to move about, but when in place it's almost like it isn't there. And that has to be the most important thing I'd say.


Of course, you could also make more of your forefinger, or, if you don't like the cost of these things, revert to the old guitarists trick of placing a stubby pencil on the fret space and looping an elastic band between the two ends around the back of the neck. (Trust me - it works).  But seriously, if you don't like capos, that's fine. Don't shoot those that do though - we don't want another strap / plectrum debate...

Video below to see them in action.


VIDEO REVIEW


Read More »

30 Sept 2016

How Do I Play The Ukulele If I am Left Handed?

Here's another question I get emailed about a surprising amount of times.

'Hey Baz, I'm left handed and wanting to learn the ukulele. What are my options?' The eternal stringed musical instrument conundrum!
left handed ukulele


Read More »

29 Sept 2016

Don't Be Afraid of Alternative Ukulele Key Tunings

Something I realised I hadn't written about in my ukulele beginners tips section

And that of using alternative tunings on the ukulele. Then I seemed to get a flurry of questions on email from readers who were experimenting with new tunings on their musical instruments. Thought it was therefore about time to look at this in a little more detail. First up, one of the most common myths you will see written about the ukulele is that standard tuning is GCEA (or rather gCEA with a small g to signify that re-entrant G, or GCEA if you are using low G). And that's it.... People think that IS the way to tune a ukulele, or more particularly, the ONLY way to tune them.... But that actually misses some pretty important aspects aside from it just not being true.

Firstly, some years ago the more common tuning for the soprano ukulele was actually D tuning (which is ADF#B) and of course the most common tuning for the Baritone tends to be in G tuning (or DGBE). In fact, many banjolele players today will still use that D tuning as they prefer the sound and string tension. It gets more complicated when you realise that years ago the original tuning for tenor ukuleles was actually G tuning yet today most people go with C tuning and many Baritone players today go for C tuning.....   So no, GCEA is only the standard of common convention TODAY.

And what is common between all these other tunings is that they have the individual strings in the same interval relationship to each other. That is to say, they are effectively the same tunings but just in different keys either a bit up or a bit down in pitch.

What does that mean? Well for a new player, the most important thing to bear in mind is that because that relationship between the strings is the same in C, D or G tuning (or any other that has the same relationship), the chord SHAPES themselves will still work no matter what tuning you use. Of course, the shape you play will then play a different chord to the chord you get  in C tuning, but they still work as chord shapes. Understanding what those chord shapes then become is key to unlocking the ease of working with ANY other relative tuning.

What I hear most commonly from people who are reluctant to try alternative keys is that they 'don't want to learn a whole new bunch of chords' or 'i'm still struggling with this tuning'. In fact, it's that reason that so many people are now choosing to tune their baritones to C tuning or even playing sopraninos at the ear piercing, shrill a whole octave above C tuning. They are doing it because they think it gets complicated when you change and they prefer to play what they know. And this post is intended to show you that it really isn't complicated at all. In fact it's easy. You already know it.

First of all, you really just need to understand the musical scale on a keyboard..


Or even better, print off a copy of the Circle Of Fifths that shows the notes of the scale in an order separated by musical fifths.

Got A Ukulele Circle Of Fifths


A musical fifth can be heard by using a piano keyboard and counting up 7 half steps including the black keys. That is to say a total of 7 physical piano keys upwards.  (And why 5ths, and not 7ths? Well because the 5ths refers the 5 intervals, which in a perfect 5th is made up of 7 semitones!) So from a C on the keyboard graphic shown above, the fifth above it is the note of G, being 7 keys (or 7 half steps / semitones) up from the C.  Count them on the keyboard above to see. The next note in the circle of fifths, (and indeed all the notes work the same way) - 7 up from the G on the piano is D, 7 from the D is the note of A, and so on. Now do the same on the Circle of Fifths - you will see that because of how it is laid out, that 7 piano key step up from C to get G is immediately next to the C on the Circle. Likewise, the 7 piano key step from G to D - on the Circle, the D is next to the G. That's because the Circle is counting the fifths, or the 7 half steps! (Incidentally - the Circle Of Fifths is helpful in all sorts of other ways in music - such as transposing and finding chord relationships etc)). Oh, and for this purpose - don't worry about the inner circle - that's not used for this level of transposing.

Anyway, I said this was easy, so let's put the theory away and get back to re-tuned ukuleles. As I say, a common factor that puts people off is the thought that they will have to learn a bunch of new chords. Bear in mind though, if you know your chord shapes for GCEA tuning, you already know the chord shapes for other key tunings so long as you keep the relationship between the strings the same!

So lets look at the most common example - the move from C tuning to G tuning that players will face if they buy a baritone. We already know the  chords in standard C tuning (called C tuning after that third string) and we know the baritone is in G tuning (the tuning of the third string again). Looking at the Circle of Fifths, we see that the G is therefore a fifth up from the note of C, as indicated by the fact it is immediately to the right of the C on the Circle. (And yes, I know that Baritones are tuned lower than C tuned ukuleles, but it is still in the key of G and the Circle of Fifths doesn't alter between octaves). So we know that the G tuned ukulele is a fifth up from the C tuned ukulele or one space up on the Circle. It therefore also follows that every C tuning shaped chord played on the G tuned ukulele will be a fifth up, or rather, one space clockwise on the Circle. And knowing that, and having the Circle with you will unlock the simple way of transposing.

Play a C chord shape on the baritone - you get a G chord - one step round on the circle. Play a G chord shape on the baritone and you get a D (one space up on the Circle), play an A chord shape on the baritone and, you guessed it you get an E. And it applies to every chord shape you know on the C tuned ukulele - if you play that chord on a G tuned baritone, it will play the chord name of the next note on the Circle. Basically every chord will be the same step up as the G is from the C. (Incidentally, don't get foxed by minor or 7th chords - just use the Circle to tell you the root key - so  C7 shape on the Baritone, plays a G7 etc.)

And this works with any tuning so long as the string relationship is the same. I mentioned above the common practice of tuning sopranino ukuleles with C tuning but a whole octave above the soprano. I think it sounds shrill and overly bright myself and I therefore prefer to tune mine in F tuning (CFAD). I just think it's nicer on the ears. And once again people look in horror and say, 'but I don't know the chord shapes for that!'. You DO know them, for exactly the same reason as above.

Back to the Circle of Fifths - we note that the F is one step to the left of the C. Therefore, if you play a C chord shape on an F tuned ukulele you get an F chord. Play a G chord shape on an F tuned ukulele and again, using the circle to go one step to the left, you get a C chord. Play an A chord shape and you get a D. All of them being one step to the left on the circle. It works for all chords.

Want to go really exotic? - what about tuning to A tuning (EAC#F#) - I've never done that, but bear with me! Again, using the circle and we note that the A is three steps round to the right from the C. So playing a C chord shape will give you an A, playing a G chord shape gives you an E. And so on.

And that really is all there is to it. Yes, you could use a piano keyboard to work out the fifths sequence if you like, but just printing off the Circle (or memorising it) is so much easier. Use the circle to work out the relationship between the chord shapes you already know in C tuning and the key you want to tune to - and that difference in numbers of steps left or right from C  on the Circle can be applied to all the chord shapes.

I hope that helps and I really hope it means that people will stop being worried about moving to Baritone. Heck, I LOVE Baritone ukes and they are no harder to play than any other! Bear in mind that this article just deals with changing the key tuning of the ukulele whilst keeping the string intervals the same,  and doesn't apply to other more exotic tunings like dropped strings and open chords, but I may save that for another post! Have fun!


Read More »

23 Sept 2016

Why The Fear Of Changing Ukulele Strings?

Not done a rant on Got A Ukulele for a while,

but a few discussions regarding changing ukulele strings on various social media channels lately brought me back to thinking about the real fear some people have in changing uke strings.

Changing Ukulele Strings


This isn't intended to re-hash the arguments over 'when should I change my strings' or 'what's the best brand' as I covered that subject before here. No this one goes back to something far more fundamental - and that's the increase in the number of people who really panic or avoid changing their strings altogether.

By way of some examples, these range from the 'oh I still have the same strings on that were on the uke when I bought it two years ago as I don't fancy changing them' to the 'I broke a string, but I had to take it to my club / friend to get them to change the strings for me'. Most bizarrely of all is an increase in the number of people reporting that they actually choose to PAY someone to change their strings for them. In one discussion I saw a guy explaining that he was paying around $30 for a string change because it gave him 'peace of mind'. Seriously? Sorry, to me that just seems completely crazy, particularly when you consider how easy it actually is.

You see, when you choose to play a ukulele (or any stringed instrument for that matter), you really need to understand that you WILL need to change strings at some point. At some point they will either just become impossible to tune properly, or at some point a string will snap. Fact of life, they don't last forever.

More importantly, strings are MEANT to be changed on a ukulele. They are consumables. They are meant to come off and go back on. And surely as part of your decision to start learning the ukulele, alongside other practice regimes you put yourself through, surely surely the practice of changing the strings on your instrument should really form part of that learning? Think of it as like the importance of knowing how to change a wheel if you buy a car, changing the  fuse in a plug if you are a homeowner, changing the ink cartridge in a printer, or even changing a light bulb. Granted, those three things have different difficulty levels, but here's the thing - changing a ukulele string really is right there with changing a fuse or a lightbulb.

And there is something else to string changing that I think is important and isn't often talked about. The process of doing it will work wonders for your connection with the instrument and how it works. You are getting right into the heart of what makes the ukulele play and getting hands on with your instrument. Add to that, the process of tuning up from scratch and it really is a good bonding exercise with your uke. Seriously.

I am interested in where this 'fear' comes from that pushes people to foist their ukulele on someone else to do the job for them. At the end of the day, changing a string only requires one knot and a bit of winding at the other end. You are not going to damage the ukulele, and nothing is going to happen that cannot be simply reversed. In fact if you get it wrong (and first time, you probably WILL) the worst that can really happen is that you snap the new string and have to get another, or at the least it will ping out of the bridge or peg and scare you half to death. (That still makes me jump..) Not really a big deal though is it?

So what are the biggest challenges that people worry about? Well the first is the bridge end of things. 'Oh, I can't understand those knots...' Really? With a slotted bridge it is simply a case of tying a granny knot (or perhaps two) that are big enough to not let the knot slip through the gap. With a tie bar bridge, granted the knot looks a little more complicated, but it really isn't. In fact it's just a granny knot too with a couple of extra winds. In fact in the world of knots, the bridge knots on a ukulele are significantly easier than tying a bow in a shoelace.

The second challenge is the 'but they keep slipping off the tuning peg' point. This does happen, but the simplest way to stop that happening is to actually tie the string to the post.  That is to say, pull the string all the way through, then feed it back through the hole and pull it tight - then start winding the strings. There is no way that is going to slip, but it can look a bit messy. With practice though you will learn how to get the wrapping right so that the coils themselves lock the string firmly.

I suppose the other fear is the 'but they just keep going out of tune' point. Yes, yes they do. Nothing I can say will change that, it's perfectly normal and you haven't done anything wrong. It just happens. Leave the ukulele tuned up a step or play it hard and keep re-tuning. They will hold eventually. This issue affects EVERY single person who has changed a string, so it's nothing to panic about.

Ukulele strings


Don't ge me wrong, string changing is a chore that nobody really enjoys, but that isn't because it's difficult. It's because it's boring and takes a bit of time! But I would still encourage any new player of the ukulele to start practicing this early. Get a new set tomorrow and put them on. If you go wrong, take them off and try again. And again and again. Get it right? Take them off and do it again, and again anyway. Trust me, you will soon see it as a shoelace and wonder why you were avoiding the process.

You may have already seen that I did a couple of videos regarding string change knots at the bridge (both tie bar and slotted types) which may help you below. But the best way is just to get on with it! I do wonder sometimes though whether ukulele ownership should come with a Compulsory Basic Training course!


Read More »

17 Jun 2016

Waverly Ukulele Friction Pegs - REVIEW

Well it's the ukulele myth that just never seems to go away. The 'friction pegs are universally awful' claim seems to be alive and kicking in the ukulele world. And it really gets me down for the simple reason that it's just not true. (What is it with the ukulele world that makes untruths 'stick' so easily??)

Waverly Friction Ukulele tuners
Waverly friction pegs on my Bruko tenor


Regular readers will have seen me rant about this before, and I include an original video of mine on the subject at the foot of this article which shows you what I mean. Put simply, CHEAP friction tuners are indeed awful, but GOOD friction tuners are sublime. They simply dont suffer from the problems people encounter when they are dealing with cheap ones. The trouble is, people assume the problems they face with cheap tuners (slipping and sticking) applies to all friction pegs. It doesn't!

And why exactly do I like friction pegs? Well lots of reasons, but mainly because they dont weigh a headstock on a soprano down like gears do and I think they just look better. They remove the look of 'ears' that geared tuners create. But, I ONLY use friction pegs that work well!

Anyway, back to the point at hand. The Waverly tuners. I'd been looking for some time to try these out. For good quality friction pegs I usually go for Grover 4 style pegs, that move like butter and hold like a rock. However I was looking to change the tuners on my John Daniel Pixie ukulele which has a very small headstock. I kind of thought the Grovers were a little too big for that headstock, and possibly a little heavy as well. I'd actually changed the tuners on the Daniel before and was using fairly standard basic pegs.

John Daniel ukulele tuners
The John Daniel before with cheap friction pegs


Waverly make a whole range of instrument tuners and are kind of the 'Rolls Royce' in the tuner world. They are used by brands like Martin, Collings and Santa Cruz on their high end guitars and for good reason. They represent an acclaimed choice where 'only the best will do'. They are based in Montana, USA.

And I will be frank here. The reason I had shied away from the Waverly tuners was because they are expensive. By that I mean they are around $45 dollars a set (not a huge amount of money, but still expensive) but bear in mind that I am in the UK so international shipping pushes that yet higher. That's about twice the price of the Grovers I normally go with. Still, they seemed a perfect option for a small ukulele on account of how sleek they look. Add to that the fact that I read nothing but great user reviews of them and I thought it was time to bite the bullet.

ukulele friction pegs
Pegs compared: From L-R Grover style 2, Grover style 4, Waverly


The Waverlys arrived. I actually bought a couple of sets, one with black buttons that I retro fitted to a Brüko Tenor ukulele and another set with Koa buttons for the John Daniel.

The friction element of the Waverly tuners is simplicity itself, and genius too. As you will have seen from the video below, the improvement on sticking and slipping with good geared tuners like the Grovers is created through the use of many internal parts (washers, bushings and collars) that hold when tight, but equally move extremely smoothly. The Waverly brand are different though - in fact there are a minimal number of parts - just 5 parts in fact, or 6 if you count the screw.

waverly ukulele friction peg


First we have a collar bushing for the front face of the ukulele. This needs the outer face to have a countersink chamfer, which wasn't really needed on the Daniel as the holes were already quite large, and was also in place on the Brüko. This allows the collar to sit flat against the headstock and not protrude and the collar serves to centre the post. If you dont have a counter sunk hole it's pretty easy to drill one and Waverly even make their own drill bit for the purpose (though most drill counter sink bits will do the job).

John Daniel ukulele headstock

Through that runs the tuning post which is a pretty standard affair. A hole in one end for the string and a hole in the other into which to screw the button.

On the back of the headstock you fit the metal chromed collar (its nickel plated brass), complete with the embossed Waverly name (which I think looks extremely classy) and into that fit a spring. Yes, a spring. These are the first friction pegs that I have seen that use a spring to create the friction effect. You then attach the button and screw it down. The action of screwing the button compresses the spring and that creates the friction. There are no metal on metal, or plastic on plastic faces that are creating the friction - these work though that spring creating the grip between the tuner and the headstock. Bear in mind that Waverly also recommend a chamfer on the back of the ukulele like the one for the collar on the front although I am not totally sure how essential that is.

It works kind of perfectly I found. At first I needed to work out how much tension to apply to stop the pegs slipping but with a few turns of the screwdriver eventually I found the nice balance between them holding and yet still turning for tuning purposes. And that turning is just ultra smooth and accurate. Unlike cheap friction pegs there is no judder, they simply turn when you want them to and then hold. Perfect!

When completely fitted I think they look the part too - and certainly for soprano ukuleles or smaller they will really look classy and remove the neck heavy 'ears' look of geared tuners. Saying that - I also fitted them to a tenor and they look great too!  If I had one complaint its that the adjustment screw uses a flat head screwdriver rather than a posi-drive / cross head. It's a minor complaint, but I just find it easier to quickly apply a cross head screwdriver than I do a flat head. Other than that though - I am absolutely delighted.

waverly pegs on John Daniel ukulele
The John Daniel after!


Now - in both of my cases, the Waverly tuners slipped right in to the holes that were already there. I can't, however, say that will the case for every instrument. According to Waverly these will retrofit directly into holes between 5.56mm and 6.35mm so that should allow you to check. Don't panic though - widening a peg hole is not as scary as you might think - I've done it to several instruments. Simply use a drill with the correct sized bit, cover the back and front of the headstock with masking tape and GO CAREFULLY and slowly - remember you are not drilling a new hole, rather enlarging one very slightly. In terms of headstock thickness, Waverly say that these will work on headstocks anywhere between 7.94mm and 14.29mm.

So yet another example of a tuner that completely disproves the myth that all friction tuners are bad. Whether you choose good quality Grovers or these Waverlys, I recommend them both. Both will show you the world of difference between cheap pegs and good quality pegs. I fully understand why the cheapest ukuleles dont fit these - it just couldn't be done for the price, but then tuners are only one of the things that are wrong with cheap ukuleles...  You get what you pay for! And to be honest with you, I would happily see these on all instruments!

(and if you want to know where I got these - StewMac)

And here is that original rant about the untruths surrounding friction tuners.


And be sure to read my other ukulele and ukulele product reviews here!

Read More »

1 May 2016

How To Adjust Ukulele Action At The Saddle

A little while ago I put up a video explaining that any ukulele player should not be afraid of adjusting their instrument for optimum play. Ukuleles, like many stringed musical instruments are designed to have certain things adjusted to assist the player. It's called a 'setup'. For some reason it's an area that people are scared of but they really shouldn't be. That video is here by the way. (How To Adjust Ukulele Setup)


That was, however just a general introduction, and I thought it was about time that I actually did a demonstration video and written guide to look at one of these adjustments in a lot more detail. The action at the ukulele saddle.

The vast majority of ukuleles will come with a removeable saddle at the bridge end of the strings, and that is removable for a reason. It's the white strip, usually made of bone or plastic, sitting in the bridge mounting over which the tail end of the strings sits before being tied off. The bridge does a number of highly important things for the ukulele. Firstly, it transfers the vibration of the strings down into the soundboard. Secondly it sets the accurate scale length of each string - ie the vibrating length of the string for accurate intonation  when you fret them. And thirdly it controls the height of the string off the top of the fingerboard. This last point is called the 'action' and it's what we are looking at today.

Often a ukulele can arrive with an overly high action, or can even develop a higher action over time as the stresses of the strings start to pull the neck up. They can also arrive with a low action. A high action makes it harder to press the strings down onto the frets at best, and if it is very high it can affect the tuning accuracy when played (the intonation). A low action can create buzzing as the action of plucking a string creates a wave down the length of it that can clip the top of the frets.

First of all, and contrary to many armchair expert advisors views, there is no perfect action setting that suits everybody. There is only an acceptable 'range'. And that is a range that gives the best compromise between playability and tuning accuracy. Go too high and you have the difficulty in fretting I mentioned above, and go too low and you create buzzing. One of the biggest myths is that you should set the action as low as you can go without buzzing. This is not particularly good advice as some very low, but non buzzing action settings can suck all tone and volume out of the strings. In short it needs to be a little higher than that. The point you go for is really down to you as a player. I know how I like my action (at the lower end) but not everybody does. The only way you will work that out is to try it.

What I find though is many players who have never considered adjusting their ukulele may be missing an opportunity. They struggle on with overly high action settings and think that it is 'just the way it is'.

So how do you measure your action? Well, you need to take a careful measurement of the distance between the bottom of the strings and the top of the 12th fret of the ukulele, this being the halfway point of the string. To measure this you really need to invest in a metal straight ruler with measurements that run right to the end of the metal so when you place it down at the tip you get an accurate reading. They are not expensive and available in all DIY stores for a few pounds. Even better you can use a string height ruler designed for stringed instruments which come with markings for common string heights in various formats. You simply hold the ruler on the top of the 12th fret and note the distance between the top of the fret and the bottom of the strings. You can check each one as on most ukuleles the fretboard is flat so they should be around the same (taking into account the different string thicknesses). (Note - if you do have a curved fingerboard, called a radius fingerboard, you will need to adjust for this).


What is the optimum? Well, like I say -it's a range really. That range depends on the string gauge and also how you play the ukulele. A more vigourous style of strumming will require a little more clearance to allow for the excessive string vibration.  For me a low action would be about 6/64ths of an inch (or 0.093 inches, or about 2.2mm). At the upper end I would go no higher than about 8/64ths (or ⅛ inch, or 0.125 inches or about 3mm). If you check your instrument and you are below the lower figure it is likely you are on the verge of string buzz or not getting the optimum tone projection and you you need to raise the saddle. If you are above the higher figure, you may be finding it a chore to press the strings down on upper frets, or are finding your fingers are getting tangled on strums or even having intonation issues.

Now for the adjustment downwards. You can take the long winded path of removing the strings, sanding the base of the saddle a little, replacing it, re-stringing it, checking it, then repeating it until it is right. You can also use a bit of mathematics to help us. Because the string creates a very long thin triangle between the saddle and the top of the 12th fret, if you find your action at the 12th is (say) 0.5mm too high, because the 12th is the halfway point of the string, taking down the saddle by double   that amount will lower the action at the 12th by 0.5mm. So it's a case of noting the height you are at, working out how much lower you want to take it, and then multiplying that by 2. That is the amount to drop the saddle by. Want to drop the action by 0.5mm, drop the saddle by 1mm.. and so on.  You can then mark that depth on the saddle with a pencil and a straight edge.

Now the tricky part - you now need to sand down the base of the saddle (leave the top alone!!) to just reach the line you marked. The trick here is to keep the base of the saddle perfectly flat. If you dont do this you will find that the saddle will dip back or forward in the slot, affecting tuning, or wont make a clean contact with the soundboard.  You can do this with a large piece of sandpaper on a hard surface working it slowly and monitoring what you are taking off. Even better is to put the saddle in a metal topped vice upside down with only the amount of saddle below your pencil mark visible. Even a cheap hobby vice will do as it's not a particularly strenuous job. You can then take a file, sandpaper or a Dremel to the base and be sure you are only taking off what you need. Sand it down, keeping it flat until you are at the marked point. I cannot stress enough how important it is to keep the base absolutely flat!

And that is it for a high action - replace the saddle and restring and you should be good to go. If you measured accurately you shouldn't face problems and your action will be lower.

Of course mistakes do happen though, so what if you go too low and create a buzzing? Or what if the saddle was too low to start with? Dont panic - this is easily remedied by simply putting a shim of thin card or wood veneer under the white saddle to raise it back up a little. You may need to add a couple of layers to get the saddle to the right height, and remember you can use that 'double the required height' rule. In other words, if your string action is 0.5mm too low at the 12th fret, raising it by about 1mm at the saddle will do the trick.

And if that lot has foxed you, I created another video that shows the process in more detail!


At the end of the day - the action should be right and there is no reason why you should struggle to play an instrument that is designed to be adjusted.  A well adjusted ukulele can be a revelation. I see some shocking examples that people battle with and it need not be like this. Sure, you can pay someone to do this for you, but really it is SO easy to do - why would you do that? Get to know your instrument!!

Just go carefully and logically and you should be fine.

And as a final (final) word - there are some instruments that dont have removeable saddles. Many plastic ukuleles do and some others with moulded or carved wooden saddles. I am afraid this process wont work for you, and if you have high action you have a far more complex job on your hands involving taking the top of the saddle down. I would urge lots of caution here as whilst dropping the top will work, it is very easy to throw the shape of the saddle top out and create tuning issues. I'd seek professional help for those! There are also some rarer features on some ukuleles that can assist with buzzing strings called truss rods running through the length of the neck. You really dont see many of those though and they are more for neck relief and NOT for adjusting action. I may deal with those in a future post.

Good luck!

(and if you want a string action ruler - it's one of those things that Amazon are perfect for.

String Action ruler - Amazon.com

String Action ruler - Amazon.co.uk )


WHY NOT DONATE TO HELP KEEP GOT A UKULELE GOING?


THANKS!
Read More »

12 Mar 2016

Hey, What's The Best Ukulele?

Probably the question I see from beginners on forums and social media the very most - the extremely open question of 'What's The Best Ukulele'? Which Ukulele To Buy? It's probably the same in all musical instrument circles.

You see that question really can't be answered without more information.... if at all. Too many things come in to play to choose a 'best' of anything. What is your budget? What scale do you want? What are your tastes in looks (plain, traditional, fancy, modern, crazy?). Without knowing these things it's impossible to advise on what I think are good purchases. Asking 'What is the best ukulele?' is like asking 'what is the best car' or 'what is the best food?' It's totally subjective. If you see a site listing the 'best' then move on - quickly!

What I do is  provide a link to my ukulele reviews page with a suggestion that they have a browse, but to be honest, I suspect that some people don't really want to read through all of that to come to a view. A shame, but true. That is always up to date though and anything with a score of 8 out of 10 or more is worth a look. Still, people still dont look

So in an attempt to summarise in an easy to share single post, I looked back over my review scores and thought I would give my 'best of' for different price categories at the date of writing!. Even if you don't want to go through all my ukulele reviews, these are the ones that I (currently) think you should have a read of. And before you complain that something is missing - these are taken from the many instruments I have tested and reviewed, but only those - hard to make a recommendation for something I haven't played!

Think of this as the Got A Ukulele Awards.. Ultimately though - this is just a list of the top scores on Got A Ukulele for easy reference.  It is also time limited to the date of this post - ie MARCH 2016.. Be aware of that - other ukes HAVE been reviewed since!!

Got A Ukulele Best Instrument £0-£50

A difficult price point because there are genuinely so many bad ones around with poor quality control.

For me the first prize goes to the Octopus Soprano Ukulele - just remarkable for very very little money. Great sound and the neck is an absolute joy!

Octopus Soprano Ukulele


Runner Up: The Makala Dolphin - what else?


Got A Ukulele Best Instrument £50-£100

At this price point we are starting to get into the realms of instruments that are usually playable from the get go, with some truly nice surprises for what is, again, very little money. It's a close call at this price point for me, but I will give the first prize to the Baton Rouge Sun Series Concert Uke. A fairly plain looking affair and built from laminate woods, but seriously - great tone, great build quality, just really really great actually!

Baton Rouge Sun Concert Ukulele


Runner Up: Snail UKS-220 Rosewood Soprano


Got A Ukulele Best Instrument £100 - £200

This is the price point where the majority of my reviews sit. There is a clear winner, but the problem here is that they don't make this one any more. It's the Omega Zedro II ukulele which I found quite remarkable for the money. But fear not - Omega have replaced it with the Klasiko model which I hear is just as good.

Omega Music Zedro Ukulele

Runner Up: Several could have taken this spot, but I will give it to the Riptide Electro Concert (with an honourable mention to the John Daniel Pixie)


Got A Ukulele Best Instrument £200 - £500

Quite a price range this one, but this is where we start to get into serious territory. It's shared hours for me between the Big Island Koa Concert - so nice looking it featured on the cover of one of my books. Looks to die for and a beautiful delicate tone that I really really liked and the Pono ATDC

Big Island Koa Concert Ukulele


Runner Up: Again - several to choose from here, but I give it to the Pono MTD Tenor - just really really nice in every way.


Got A Ukulele Best Instrument £500 plus

An odd one here and one where I am clearly opening myself up to criticism - 'Hey what about Kamaka? What about Martin?' Well, as I say - these are just based on ukuleles I have tested. For me the winner is clear and I think it's a stunningly good instrument. First place goes to the Kanile'a K1 Tenor - no frills, but wonderful clear woody tones that still make me smile to this day.

Kanile'a K1 Tenor Ukulele


Joint Runners Up: Beltona Tenor Resonator - one instrument that has made me smile more than many others recently. The other one being the quite simply amazing Blackbird Clara. 

So there you have it - I will, in time, adjust this listing as new instruments get reviewed if they change the top spots. But for now, the next time I get asked 'What is the best ukulele', this is the post I will give them the link to!


Read More »

5 Mar 2016

As A Ukulele Performer - Do You Need Insurance?

Here's a ukulele question I get asked a lot. If ever there is a subject guaranteed to cause disagreement in forums it's the subject of Insurance for bands and performers who are going out gigging. Rules and regulations on this can be complex, misleading and confusing and it is not helped by many people spreading false information as to what is what. Actually though, I consider the subject quite simple. For me it comes down to two things. Do you want to be able to play every gig and do you want to lose the shirt off your back if something goes wrong?


ukulele band insurance


First things first, I appreciate that the ukulele world is global and I suspect different things apply in different countries. I write this as a good practice guide that should apply pretty much everywhere, but please bear in mind that these comments are related to my country and experience (The UK).

First up, lets get one thing clear. There is NO law that makes insurance a strict requirement. You are playing gigs, not driving a motor car. Insurance is all about risk and protection. As such, many bands don't carry insurance and many do. And this is where the mis-information starts to spread.

And why are we talking about insurance anyway, and insurance for what? Well in the main I am dealing here with Public Liability Insurance or PLI.  This is distinct from Insurance for your gear and instruments (although I would recommend that if you are gigging that you check whether your home contents insurance does actually cover your kit - it more than likely doesn't).

So - PLI - this is insurance that covers you / your band in the event that an incident happens for which the blame falls with you. Without insurance you could be required to foot the bill which could be anything from thousands of pounds (in the event of a minor incident) to eye watering numbers in the event of a catastrophe. We are talking here about several sorts of costs. Firstly there is repair or replacement of something that is damaged ( such as walking past a punters car in the car park and scratching it with your instrument case, or damaging the venue negligently). Second is the cost of compensation. That is to say the cost claim brought by someone who is injured or harmed (or worse) or suffers some sort of loss on account of your actions (so things like trips, falls, electrocution and the like). Finally we have the wonderful concept of legal costs (yes, if you are to blame you are probably liable for those too). Add them all up and the bill can be huge, even for minor things.

So we now come to the first myth - the 'It will never happen to us' defence, and therefore you don't 'need' insurance. Are you sure about that? The horrible fact of life is this - firms exist to specifically chase claims for negligence for the smallest thing. You will have seen the TV adverts. So this could be something as simple as somebody tripping over one of your music stands, instrument leads or similar and breaking their ankle. That really isn't so unlikely when you think about the fact that a lot of venues contain people who contain a lot of alcohol! Of course, that is the very mild end of the scale. What if one of your PA speakers falls on a crowd member? What if some of your electrical equipment blows the venue fuses or worse, catches fire? What if your wiring electrocutes somebody? (More on electrics below). Yes, you may think these are all unlikely, but in my experience, life has a funny habit of making the most unlikely things happen when you least expect them. If blame for any of these incidents can be attributed to your or your band, you could be staring at a claim.

Second myth - the 'Insurance is the responsibility of the venue' claim. This is not actually true. Most venues that host anything involving the public will indeed carry their own insurance, but they are totally at liberty to ask you to insure yourselves also. Besides, are you willing to rely on their insurance? I see many people get quite sniffy about this point and claim that its 'an outrage' and 'I would refuse to play'. But the really simple fact is this. An increasing number of venues ARE asking for bands to have insurance so it really then comes down to the question of 'do I want to play this gig or not'?  There is no point arguing with the venue if that is their policy - you won't win and the only result will be that you won't get the gig. In my experience, wedding venues, council property and the like will almost certainly require it, and an increasing number of theatres and even pubs are starting to ask for it too. However much you may disagree with the point, do you really want to rule out so many venues on a point of principle? Seems like cutting your nose off to spite your face to me.

But now lets bring both of those myths together. Even if a venue doesn't ask you to carry insurance, are you prepared to take the chance that if there is an incident that you can rely on them to be fully covered, (and rely on the lawyers to not try to mount a tandem claim against you)? The reality of life is that a claims lawyer will look at targeting absolutely anyone who they think could have liability. It might be the venue, it might be you, it might be both of you. In short - are you prepared to defend yourself by relying on a statement that the claim should be directed at the venue and not you?

So, as you can probably tell, I personally think insurance is a damn good idea if you are performing regularly. And the real bonus here is that PLI insurance is not actually all that expensive. I am not a financial advisor so I won't be giving specific recommendations here apart from to say that in my own experience, insuring a band of 8 people playing with all electric gear cost about £70 for 12 months. That is peanuts to each player for the peace of mind it provides. Joining the Musicians Union could be an option too as this gives you cover as part of a lot of other things, but if you want to shop around just google 'PLI cover for bands'. So I personally hold the view that when it's such a low cost, why WOULDN'T you hold insurance? Perhaps you wouldn't on a point of principle, but I am afraid your principles are not a valid defence to a negligence claim.

So to sum up. There is no legal requirement for you to have insurance, but an increasing number of venues are asking for it. Even if the venues you play don't ask for it, are you prepared to rely on their insurance in the event of an incident? I personally wouldn't. Please don't get me wrong, I am not a fan of the vulture mentality of the Insurance and Legal worlds and it would be marvellous if we didn't have this stuff. But we do. In playing a gig you are offering a service and you are working. Things can go wrong and you could be the target if they do. Your decision will be based on where and how often you are playing, but with increasing numbers of ukulele clubs going out now and playing gigs every month, I would say that is frequent enough to need to look into insurance. Even if you are just busking in town do you think the local Council will take responsibility for a member of the public who trips over your instrument case and breaks their wrist?


And now a final word on something connected to electrical risk and Insurance - PAT testing. PAT testing is a 'Portable Appliance Test' that is in accordance with the Electricity At Work Regulations and is essentially a test and certification of anything that plugs in to the mains for safety.  This is not a legal requirement but you may find that venues ask to see your certificate and that your Insurance requires you to have it if using electrical gear. PAT testing is required for any electrical item over 12 months old and needs to be renewed yearly (or in some cases, more often). It will cost you about £5 per item and I would say it is highly recommended. You will know how Insurance companies like to wriggle when they get a claim so you need to carefully read your policy and ensure that you are complying with it in every way. In fact, most band insurance policies will place a responsibility on the band to ensure they take reasonable precautions to avoid damage or injury, and PAT testing is part of that. A PAT certificate  for your gear in the event of a claim for something damaged by electrical causes (like a fire) will certainly assist your case. Insurance aside though, I have played venues who asked to see the equipment certificates before they would let me plug anything in. Annoying perhaps - but it's another one that leaves you with the question 'do I want this gig or not?'


Read More »

20 Feb 2016

What To Take To The Ukulele Gig

I was looking back over some of my oldest posts on Got A Ukulele and found one, very briefly and clumsily written about what to take in your uke gig bag. Thought it was about time to write a more expanded version.


Ukulele gig bag


With many readers considering appearing on stages now as solo artists, in clubs or with bands, I am sure one thing crosses all of their minds - what gear do I need to take with me to a show? I know, the ukulele is small, and the concept of taking a lot of gear probably seems a bit odd to many people who play it, but there will be some 'must carry' items, and some which are a bit more luxurious. I suppose what you take also depends on what sort of show you are playing. There is a world of difference between going out busking acoustically to playing your own solo show where you may be expected to take the amplification as well as the instrument. Likewise playing a dedicated stage at a festival or theatre can be a different experience altogether. What you take needs to be tailored to what you are going to be doing. Most of all though - the gear is your responsibility and not that of the venue.

Warning though - you thought Ukulele Acquisition Syndrome was bad? Beware GAS - 'Gear Acquisition Syndrome'... (I know some people as obsessed with FX pedals, microphones or even instrument cables as they are with ukes..)


THE ESSENTIALS

- The ukulele - Naturally - make sure it is in good order. If it needs batteries, make sure they are fresh. Make sure you are happy with the strings. If they are showing signs of wear, consider changing them. Murphy's Law dictates that if a string is due to break, it will break during a show.

- Spare strings - Think about it - do you really want to be one song in to your set and lose one of your strings? It can and DOES happen. Just keep a spare pack in your gig bag... Simple. And if you use one of them, make sure you top up the pack before the next gig! Of course, another alternative can be found in the Luxury section below.

- Instrument Cable - If you are plugging in, there is every chance that the venue engineer may provide you with necessary cables. But to ASSUME that they will do that is a sure fire way to being caught out. If you amplify this way, carry a cable. Oh, and make sure it's not only 4 feet long.. (There is a bit more detail about cables in the footnote). If you are relying on someone else for cables, you are assuming they have enough, and you are assuming they are in good condition. Sadly, cables for loan at venues are usually pretty dreadful.

- Song sheets / crib notes - If you need them, carry them. You won't want to be without them if you rely on them. Just remember it looks far far better to an audience to have them placed somewhere that doesnt encourage you to stare down into them rather than looking and engaging with the punters!

- Set list - Take a few set lists printed out. What? You don't use a set list? That's very brave. Seriously - it's just a list - you are allowed to depart from it - but a bit of pre-planning for any show makes perfect sense, especially if you play with other people.

- Your tuner - If you use one - pack it (and a spare battery!). Seriously though - when you are plugged in on stage,  if you need to tune, please mute the instrument. Nobody wants to hear you tuning up! And your tuner can be a tuning fork - as Phil Doleman once said to me - it's the only tuner that you can use to eat a Chinese takeaway with after the gig.

- Other essentials that you always use.  - Depends what you use - if you use a strap, take it. If you use a capo - take it. If you use picks, take them.

- Copy of your PLI insurance certificate - This is a whole other subject in itself. Seriously though - more and more venues are asking for insurance these days. You can moan all you like about the concept, but in my experience, with some places you either have it or you don't play. It's as simple as that. Bad advisors are out there telling beginners that the responsibility is for the venue, but that is just plain wrong.  Bad advisors are also saying that performers should tell the venue to get stuffed... Sure, you could do that, but remember, you performing is COMPLETELY up to the venue.. Turning up and saying 'yes we have it, but the certificate is at home' is the same as not having it at all.  It's like telling a policeman your car insurance is 'in the post'... Keep a photocopy in your gig bag. There is more on insurance for musicians in this post.

THE VERY HELPFUL

These will very much depend on how you gig and the sort of venues you are playing, so tailor them to fit.

- FX Pedals - Not for everyone I suppose, but if you do use pedals - make sure you have all you need, have batteries or power leads for ALL of them and all interconnect cables. Once again, don't assume an engineer will have all this for you. Your responsibility - make sure it's all ready to go! Ideally - have them set out on a pedal board you can pack into a small suitcase with the interconnect cables already in place. Then it's just a case of plugging in the power, plugging the uke in one side and the other to the amp and you are ready to go. Nobody wants to watch you build your pedal rig every time you start a gig.

- Your own microphone - Sure, a lot of venues will provide microphones, but some don't. Even if they do, you may prefer not to use one that has been drooled into by a hundred other stage performers. Nothing wrong with swapping your own in place - just tell the engineer before meddling so they know. Oh, and perhaps carry a spare mic clip - always useful.

- Microphone stand - If you are using your own mic - well.. naturally - a stand makes sense..

- Extra cables - that is - extra cables for EVERYTHING - If you plug your uke in - take a spare instrument lead. If you use your own microphone, take a spare cable for that. If you use power cables, take spares. Cables DO eventually just give up the ghost and you can spend forever trying to track down a bad connection. You don't want to be doing that with five minutes to show time.  Often just easier to say, 'fine, I'll work on that bad cable tomorrow - for now though I'll just swap this spare in place and get on with the show'...

- Spare batteries - See above - spares for your spares...

- Clothes Pegs / string or twine - Just because they are useful for holding a multitude of things, but not as useful as...

- Duck Tape - Is it Duck or Duct? Is it Gaffer tape? Whatever - there is no item on the planet that cannot be jerry fixed into working at short notice with this stuff. Good for taping down cables to the floor so you don't kill your audience by tripping them. I even saw somebody once attach a strap to a broken pin by taping their guitar to the strap. Where would we be without this stuff?

- Peg winder - If you do need to change strings - these things cost pennies and will make the whole thing less painful for the audience (and you).

- Spare picks / spare strap / more spare strings - If you use them, then why not? They are small - fit them in the front pocket of your bag and in any spare spaces in your gear. Picks also have an uncanny knack of not being where you left them. Carry a load in your pockets if you use them. As for more strings - well, if you have stack of string packs at home, leaving them in your gig bag is probably the best place for them.

- Screwdriver -  Again - they are small. You never have a screwdriver when you need one..  Seriously, I have changed fuses on 13 Amp plugs on stage before now, but at the very least they can be used for tightening friction pegs.

- Music stand - Hey - if you use one! Have you thought about a clip on light for it - you can't guarantee a lot of light on stage to allow you to read.. Oh, and that's where clothes pegs also come in handy for outdoor gigs.

- Sharpie - Nothing worse than making alterations to a set list or song sheet with a biro that is running out so you then can't read it. Make it clear. But hey - Sharpies are just handy for all sorts of things..

- Toolkit - I've covered some tools above, but you might want to consider a fuller toolkit to take with you. Speaking as someone who has taken a lighting rig apart pre-gig and rewired several microphone cables, trust me - they do get used.

- Pocket torch - A small Maglite can be invaluable for finding things on a dark stage.

- Power reel - Sure, most performance venues will provide you with some power sockets on stage, but it is your responsibility to have the extension reels to get power to where you want it. It may be helpful to carry a range - a longer reel and some shorter extension bars. Again, remember Murphy's Law. If your gear requires X number of plug sockets, you can guarantee that the venue has one less than you need.


THE LUXURIES

So, where do we stop with these? I suppose some are more luxurious than others, but worth thinking about.

- DI Box - Basically a box that turns your unbalanced ukulele signal (with a jack socket) into a balanced signal suitable for entering a mixing desk on the other side of the room with no issues, degradation of sound (or vice versa). Engineers will love you and may even high five you if you have your own. They are relatively cheap and if you are playing plugged in just one of those things that many people carry. In fact, some wouldn't suggest these should be in the Luxury box at all.

- Spare ukulele - Why worry about the on stage string change when you can just plug in another instrument. Seriously - many people do this - and why not - ukuleles are not that big. Bear in mind, it might not be a string snap that foxes you. I have seen pickup connections fail on stage on more than one occasion. It's happened to me once where I suddenly had zero sound out of the jack socket - swapped to another uke and carried on.

- PA system - The ultimate I suppose is the system that you can pack into your car or van that allows you to perform anywhere there is power - speakers for the audience, perhaps foldback monitors for your vocals - this really is though a whole other discussion point!

- Mixer - If your act involves a number of people and you are currently amplifying individually through small battery amps you may be considering a PA. If you are considering a PA, then a mixer should also be looked at - basically a device to allow you to 'mix' numerous vocals and instruments into one output for the amplification.

- Lighting rig - if you are setting up a show in an otherwise dull room such as a village hall - you would be surprised how much more professional things will look with some lighting. With the advent of LED lighting rigs these days, portable stands offering colour washes can be obtained for very little money compared to the old rigs.

- Spare PA system - A spare just in case... this is getting silly.. (or perhaps not - most professional touring bands carry backup amplifiers)

So generally speaking it's all common sense. Everything will depend on where you are playing - not all of this will apply to busking gigs for instance. Just run through and work out what may apply to you. Hopefully some food for thought though.

Remember this - if YOU are booked, then it is YOUR responsibility to deliver what you said you would. Whilst many venues will assist if they can (and other bands can often assist here), if you turn up and fail to play because you say to the venue 'sorry, I broke a string', 'Sorry, I forgot my words' or 'sorry my instrument cable is broken'- then that is a sure fire ticket to never being asked to play there again. Glitches do happen, but in the wise words of the Cub Scouts - BE PREPARED..

----

A final word on cables. If you are an absolute beginner this may confuse you, but this article is referring to two main types of cable.

Standard instrument cables (for plugging a ukulele into an amplifier) are usually ¼ inch jack cables with a male plug at either end. One goes in to the uke, the other into the amp or mixer. I'm often asked if ukuleles need special cables or will one marked 'guitar' work. The short answer is - a cable for guitar will work perfectly.
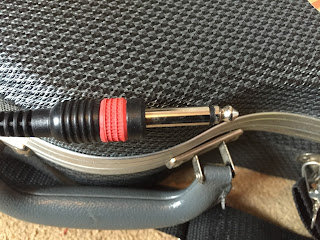
instrument ¼ jack cable
Standard instrument ¼ jack plug


Standard microphone cables tend to be balanced XLR cables - these are three pin sockets that connect the microphone to the mixer (or amplifier). The male end goes into the desk or amp, and the female and into the base of the microphone. Confusion arises where you don't have an amplifier that takes and XLR input - for this reason XLR to ¼ inch jack cables are available.

XLR cable
Female end of XLR cable

Finally, an instrument like a ukulele can be plugged into a mixing desk XLR input through the use of a Direct or DI box. With these, you run the ukulele into the box with a standard instrument lead, then run an XLR lead from the box to the amplifier or mixing desk. Generally speaking, in all applications XLR is the better quality option, but in reality, when on stage, plugging in a ukulele will usually use a standard jack lead.


Read More »

Say thanks to Got A Ukulele

Please Help Keep This Site Going!

If you enjoy this blog, 'thank you donations' for the free content are welcomed. Aside from the Google ads, I don't get paid to write this blog and for reasons of impartiality a not sponsored by brands or stores.